DIY Sauna Kit: Build Your Home Sauna in 2025

*We may earn a commission for purchases made using our links. Please see our disclosure to learn more.
The sweat dripped down my forehead as I sat in my cramped apartment bathroom, desperately trying to recreate the spa experience I’d fallen in love with during a weekend retreat. Steam from the hot shower wasn’t cutting it, and I knew I needed something more authentic – something that would transform my daily routine from mundane to magical. That’s when I discovered the world of DIY sauna kits, and it changed everything about how I approached wellness at home.
“Building a sauna is not just about creating a space to sweat; it’s about crafting a sanctuary for mental and physical restoration that becomes an integral part of your daily wellness routine.”
– Finnish Sauna Association
Key Takeaways
- DIY sauna kits offer an affordable alternative to professional sauna installation, typically costing 50-70% less than custom builds
- Most kits can be assembled in 1-3 days with basic tools and moderate DIY skills
- Indoor and outdoor options are available to suit different spaces and preferences
- Health benefits include improved circulation, stress reduction, and muscle recovery
- Proper ventilation and electrical requirements are crucial for safe installation
- Regular maintenance ensures longevity and optimal performance of your home sauna
Recommended DIY Sauna Kits on Amazon
1. DIY Outdoor Sauna Plans


Transform your backyard into a relaxing retreat with this DIY sauna kit plan. Designed for ease and authenticity, this set of detailed instructions guides you through building your own wood-burning sauna cabin, measuring a spacious 8 x 13 feet. Whether you're a seasoned DIYer or just getting started, these blueprints make the project approachable and rewarding. The design emphasizes traditional sauna heating and maximizes space for multiple users, allowing you to enjoy the health and wellness benefits of sauna therapy without leaving home.
Looking for a way to unwind after a long day or add a touch of luxury to your backyard? A DIY sauna kit is the perfect solution. With the DIY Outdoor Sauna Plans from The Best DIY Plans Store, you can build your own wood-burning sauna cabin and enjoy the soothing benefits of heat therapy anytime you like.
- Authenticity: Wood-burning design delivers a classic sauna feel.
- Spaciousness: The large layout is perfect for small gatherings or solo relaxation.
- Value: Inexpensive way to enjoy a premium wellness experience at home.
- No Materials Included: Only plans—materials must be purchased separately.
- Skill Level Required: Some basic carpentry experience is recommended.
- Outdoor Setup Needed: Not suitable for indoor installation.
2. The Sauna: A Complete Guide 2nd Edition

Whether you’re considering a DIY sauna kit or want to build your own from scratch, this bestselling guide by Rob Roy is the ultimate companion. Fully revised and expanded, this second edition delves into the rich history and timeless traditions of the Finnish sauna while offering practical, hands-on instruction for building and enjoying your own.
If you’re planning to create your own at-home wellness space, a DIY sauna kit is just the beginning. But before you pick up your tools, equip yourself with the knowledge and inspiration found in The Sauna: A Complete Guide to the Construction, Use, and Benefits of the Finnish Bath by Rob Roy.
- Comprehensive: Covers history, health benefits, use, and construction in one volume.
- Versatile Instructions: Includes both cordwood and conventional wood-framed sauna builds.
- Inspiring Visuals: New edition features beautiful full-colour photos to spark ideas.
- Dated Design: First published in 2004; some modern materials or methods may be missing.
- Beginner Complexity: May feel technical for complete novices without building experience.
- Not a Kit: No physical materials included—informational only.
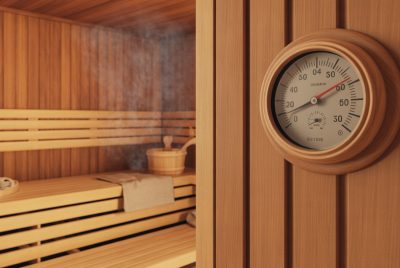
3. Foxyoo Sauna Thermometer


Ensure your sauna sessions are both safe and comfortable with the Foxyoo Sauna Thermometer, a must-have accessory for any sauna setup. Whether you're enhancing a DIY sauna kit or updating an existing space, this precisely calibrated thermometer and hygrometer combo helps you monitor temperature and humidity for optimal results.
When you’re building your dream relaxation space with a DIY sauna kit, every accessory matters—especially those that ensure your safety and comfort. The Foxyoo Sauna Thermometer is one such essential, offering accurate tracking of both temperature and humidity during every session.
- Accurate Monitoring: Tracks both temperature (±4℉) and humidity (±5% RH).
- Sauna-Ready Design: Durable materials and clear display tailored for hot, humid environments.
- Easy Installation: Wall-mounted setup takes minutes with basic tools.
- Avoid Heat Sources: Needs to be placed away from heaters for accurate readings.
- Mixed Accuracy Reviews: Some users report slight variances in high-heat conditions.
- Basic Display: Not digital—may not appeal to tech-savvy users.
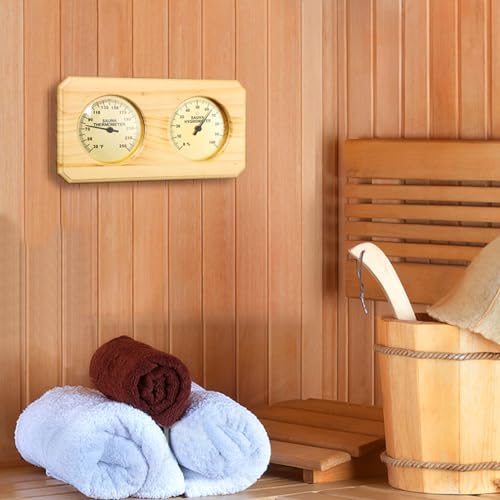
4. Allwood Saunas Eagle Kit


Add a rustic, functional touch to your sauna experience with this 2-in-1 Sauna Timer and Thermometer by KEXIKELE. Crafted from certified red cedar wood from Canada, this wall-mounted accessory serves both as a 15-minute sand timer and an indoor temperature gauge—perfect for keeping your sauna sessions timed and safe.
Every detail matters when building a home sauna, and this 2-in-1 Sauna Sand Timer and Thermometer is a simple but smart upgrade to your DIY sauna kit. Made from red cedar wood, it not only enhances your space with its natural beauty and fragrance but also serves a practical purpose—timing your sessions and tracking the temperature.
- 2-in-1 Function: Combines time tracking and temperature monitoring in one compact unit.
- Natural Red Cedar: Aromatic and sustainable wood enhances sauna aesthetics and experience.
- Affordable Upgrade: Budget-friendly accessory for any DIY sauna kit build.
- Limited Accuracy: Only basic temperature indication—less precise than digital thermometers.
- Mixed Durability Feedback: Lower ratings suggest quality may vary.
- Short Timer: Fixed 15-minute sand timer may not suit all sauna routines.
My Journey Into DIY Sauna Building
Three years ago, I was spending hundreds of dollars monthly on spa visits, chasing that perfect moment of relaxation that seemed to slip away the moment I returned to my hectic schedule. The stress of work, the constant digital noise, and the lack of a proper wellness routine were taking their toll. I needed something more sustainable, more accessible – something that would be waiting for me at home after every challenging day.
That’s when I stumbled upon DIY sauna kits during a late-night internet search for “affordable home spa solutions.” The idea seemed almost too good to be true: could I really build my own sauna? The skeptic in me wondered if it would actually work, if the experience would be authentic, and if I had the skills to pull it off.
The Three Game-Changing Moments in My Sauna Journey
Discovery 1: The Power of Infrared Technology
My first breakthrough came when I learned about infrared sauna technology. Unlike traditional steam saunas that heat the air around you, infrared saunas use light to directly warm your body. This was a revelation for someone living in a smaller space – no need for massive ventilation systems or complex plumbing.
The moment I experienced my first infrared session in my newly built kit, I felt the gentle, penetrating heat working its magic. My muscles relaxed in ways I’d never experienced before, and the stress that had been my constant companion began to melt away. The infrared panels heated up quickly, reaching optimal temperature in just 15 minutes compared to the 45-minute warm-up time of traditional saunas.
What surprised me most was how this technology solved my biggest obstacle: installation complexity. The kit came with pre-wired infrared panels that simply plugged into standard electrical outlets. No electrician needed, no major renovations required.
Discovery 2: The Importance of Wood Selection
My second major learning moment came when I realized that not all sauna woods are created equal. Initially, I was tempted by cheaper pine options, but research led me to understand why cedar and hemlock are the gold standards for sauna construction.
Cedar, with its natural resistance to moisture and insects, became my material of choice. The aromatic properties weren’t just pleasant – they were therapeutic. Each session felt like a mini aromatherapy experience. The wood’s natural oils created an environment that was both antimicrobial and incredibly soothing.
When I ran my hands along the smooth cedar panels during assembly, I could feel the quality difference. The wood was properly kiln-dried, meaning it wouldn’t warp or crack under the intense heat cycles. This attention to material quality transformed what could have been a frustrating building experience into something genuinely enjoyable.
Discovery 3: The Ritual of Daily Sauna Use
The third transformation happened not during construction, but in the weeks following completion. I discovered that having a sauna at home wasn’t just about the 20-minute sessions – it was about creating a daily ritual that anchored my wellness routine.
Every evening at 7 PM, I would dim the lights, start the sauna, and spend those 15 minutes of warm-up time in meditation or light stretching. This pre-sauna routine became as important as the session itself. The anticipation, the preparation, the intentional transition from day to evening – it all contributed to the therapeutic benefit.
What started as a way to save money on spa visits evolved into something far more valuable: a consistent practice that improved my sleep, reduced my stress levels, and gave me a sanctuary within my own home.
Overcoming Common DIY Sauna Challenges
Building a sauna kit isn’t without its obstacles, and I want to be honest about the challenges you might face:
Space Constraints and Planning
The biggest hurdle I encountered was determining the right location. My initial plan for a basement installation had to be scrapped when I realized the ceiling height was insufficient. Saunas need adequate headroom – typically 6’6″ minimum – and proper ventilation access.
I learned to think creatively about space utilization. Corner installations can maximize floor space efficiency, while barrel saunas work wonderfully in outdoor settings where indoor space is limited. The key is measuring twice and planning thoroughly before ordering your kit.
Electrical Requirements and Safety
Most DIY sauna kits require dedicated electrical circuits, which initially intimidated me. However, I discovered that many infrared models operate on standard 120V outlets, while only larger traditional saunas need 240V connections.
Safety became my top priority. I invested in proper GFCI protection, ensured adequate ventilation, and followed all manufacturer electrical specifications. When in doubt, I consulted with a licensed electrician – the peace of mind was worth the consultation fee.
Assembly Complexity and Time Management
The assembly process took longer than expected. What manufacturers claimed would be a “weekend project” stretched into three long days. However, this taught me valuable lessons about patience and attention to detail.
I learned to organize all components before starting, to work methodically through each step, and to not rush the process. The satisfaction of seeing the sauna take shape piece by piece was incredibly rewarding, and the final result felt more meaningful because I’d built it with my own hands.
Moisture Control and Maintenance
Post-installation, I discovered that proper moisture management is crucial for sauna longevity. I had to learn about ventilation requirements, cleaning protocols, and seasonal maintenance routines.
Installing proper ventilation prevents mold and ensures comfortable sessions. I added a small exhaust fan and learned to leave the door slightly open after each use to allow moisture to escape. Regular cleaning with mild, sauna-safe cleaners keeps the wood in optimal condition.
The Broader Impact on My Wellness Journey
What surprised me most about building a DIY sauna wasn’t the construction process itself, but how it transformed my entire approach to self-care and wellness. The sauna became the cornerstone of a more intentional lifestyle.
Physical Health Improvements
Within weeks of regular use, I noticed significant improvements in my circulation and muscle recovery. As someone who exercises regularly, the sauna became an essential part of my post-workout routine. The heat therapy helped reduce delayed onset muscle soreness and improved my flexibility.
My sleep quality improved dramatically. The body’s natural temperature drop after sauna use seemed to trigger deeper, more restorative sleep patterns. I found myself waking up more refreshed and energized.
Mental and Emotional Benefits
The sauna became my meditation space, my thinking chamber, my escape from digital overwhelm. The heat created a natural barrier between me and the outside world, forcing me to be present in the moment.
I developed a practice of using sauna time for reflection and goal-setting. Some of my best ideas and clearest thinking happened during those quiet, warm moments. The sauna taught me the value of intentional solitude and regular digital detox.
Social and Family Connection
Unexpectedly, the sauna became a social catalyst. Friends and family members were curious about the DIY project, and sharing sauna sessions became a unique way to connect and unwind together.
My weekend sauna sessions evolved into meaningful conversations with loved ones. There’s something about the shared experience of heat therapy that breaks down barriers and encourages authentic communication.
Practical Advice for Your DIY Sauna Journey
Choosing the Right Kit for Your Space
Start with honest assessment of your available space, budget, and skill level. Measure carefully and consider factors like:
- Indoor vs. outdoor installation preferences
- Available electrical capacity
- Ventilation requirements
- Local building codes and permits
- Long-term maintenance accessibility
Essential Tools and Preparation
Most kits require basic tools: drill, level, screwdriver, measuring tape, and safety equipment. Prepare your workspace thoroughly and ensure you have adequate lighting and ventilation during assembly.
Create a dedicated staging area for components and hardware. Organization during assembly prevents lost pieces and reduces frustration.
Assembly Tips from Experience
- Read instructions completely before starting
- Work with a partner when possible – many steps require two people
- Take breaks and don’t rush the process
- Double-check electrical connections before first use
- Test all functions before final assembly completion
Safety Considerations
Never compromise on safety features. Install appropriate temperature controls, ensure proper ventilation, and follow all manufacturer guidelines for electrical connections. Consider professional consultation for complex electrical work.
Creating Your Personal Sauna Ritual
The true value of a DIY sauna extends far beyond the construction project. It’s about creating a sustainable wellness practice that fits your lifestyle and needs.
Establishing Routine
I discovered that consistency trumps duration. Regular 15-20 minute sessions were more beneficial than occasional longer sessions. Find a time that works with your schedule and stick to it.
Enhancing the Experience
Consider additions that enhance your sauna experience:
- Aromatherapy oils safe for sauna use
- Comfortable seating cushions
- Soft lighting or candles
- Relaxing music or nature sounds
- Hydration station nearby
Seasonal Adaptations
Your sauna routine might change with seasons. Summer sessions might be shorter and cooler, while winter sessions provide extra warmth and comfort. Adapt your practice to support your body’s changing needs throughout the year.
Maintenance and Longevity
A well-maintained DIY sauna can provide decades of service. Regular maintenance includes:
Daily Care
- Wipe down surfaces after each use
- Leave door open for air circulation
- Check temperature controls function properly
Weekly Maintenance
- Deep clean with sauna-safe cleaners
- Inspect electrical connections
- Check ventilation system operation
Seasonal Care
- Inspect wood for signs of wear or damage
- Test all safety systems
- Consider professional electrical inspection annually
The Continuous Journey
Three years later, my DIY sauna continues to evolve. I’ve added custom lighting, upgraded the sound system, and created a small adjacent relaxation area. The initial investment of time and money has paid dividends in improved health, reduced stress, and enhanced quality of life.
What started as a cost-saving measure became a transformative wellness practice. The sauna taught me that self-care doesn’t have to be expensive or complicated – it just needs to be consistent and intentional.
Your Turn to Build Wellness at Home
If you’re considering a DIY sauna kit, I encourage you to take that first step. Start with research, measure your space carefully, and choose a kit that matches your skill level and budget. Remember that building a sauna is just the beginning – the real journey starts with your first session in the space you’ve created with your own hands.
The path to better wellness doesn’t require expensive gym memberships or regular spa visits. Sometimes it starts with a simple decision to invest in yourself and create a sanctuary within your own home. Your future self will thank you for the gift of accessible, daily wellness that a DIY sauna provides.
Whether you’re seeking stress relief, improved physical health, or simply a quiet space for reflection, a DIY sauna kit can be the foundation for a more intentional, wellness-focused lifestyle. Take that first step, trust the process, and prepare to discover the transformative power of heat therapy in your own home.
Conclusion
Building my own sauna was one of the best decisions I’ve made for my health and well-being. What began as a simple cost-saving measure evolved into a cornerstone of my daily wellness routine. The process taught me valuable DIY skills, provided a sense of accomplishment, and created a space that continues to provide physical and mental benefits years later.
The journey wasn’t without challenges – from space planning to electrical considerations to assembly complexity. However, each obstacle became a learning opportunity that made the final result more meaningful. The satisfaction of relaxing in a sauna you built with your own hands is truly incomparable.
If you’re ready to transform your approach to wellness and create a personal sanctuary at home, a DIY sauna kit might be exactly what you need. Start with careful planning, choose quality materials, and don’t be afraid to seek help when needed. Your future self will appreciate the investment in long-term health and happiness.
Frequently Asked Questions
Q: How long does it typically take to assemble a DIY sauna kit?
A: Most DIY sauna kits can be assembled in 1-3 days, depending on the size and complexity. Simple infrared models might take 4-8 hours, while larger traditional saunas could require 2-3 full days. Having a helper significantly reduces assembly time.
Q: Do I need special permits to install a DIY sauna kit?
A: Permit requirements vary by location and installation type. Indoor saunas typically require electrical permits, while outdoor installations might need building permits. Check with your local building department before beginning your project to ensure compliance with local codes.
Q: What’s the difference between infrared and traditional steam saunas?
A: Infrared saunas use light to directly heat your body at lower temperatures (120-140°F), while traditional saunas heat the air around you to higher temperatures (160-200°F). Infrared saunas are easier to install, use less energy, and are often more comfortable for beginners.
Q: How much does it cost to operate a home sauna?
A: Operating costs vary based on sauna type and usage frequency. Infrared saunas typically cost $0.10-$0.25 per session to operate, while traditional saunas might cost $0.25-$0.50 per session. Most users spend $10-$30 monthly on electricity for regular sauna use.
Q: Can I install a DIY sauna kit in an apartment or condo?
A: Yes, many compact infrared sauna kits are designed for apartment living. However, you’ll need to verify electrical capacity, ensure adequate ventilation, and check lease agreements or HOA regulations. Some units are specifically designed for small spaces and standard electrical outlets.