How to Host a Backyard BBQ Party for Beginners
*We may earn a commission for purchases made using our links. Please see our disclosure to learn more.
The first time I hosted a backyard BBQ party, I was a bundle of nerves. Standing before my brand-new grill, a wedding gift I’d been too intimidated to use for months, I couldn’t shake the feeling that I was about to disappoint my guests with either raw chicken or charcoal hockey pucks. The smell of lighter fluid hung in the air as friends began to arrive, and I realized I had forgotten to chill the drinks. That day taught me that hosting a successful BBQ isn’t just about the food, it’s about preparation, organization, and creating an atmosphere where everyone feels welcome.
Years later, after countless cookouts ranging from intimate family gatherings to neighborhood block parties, I’ve learned that to host a backyard BBQ party successfully doesn’t require professional culinary skills or expensive equipment. What it does need is a thoughtful approach, some basic knowledge, and the willingness to embrace the occasional mishap with laughter rather than panic.
Whether you’re firing up the grill for the first time or looking to elevate your outdoor entertaining game, this guide will walk you through everything you need to know about how to host a backyard BBQ party that’s stress-free and memorable. From selecting the right equipment and planning your menu to creating ambiance and keeping your guests entertained, I’ll share the lessons I’ve learned along the way, both the triumphs and the flame-outs.
Key Takeaways
- Plan ahead: Create a checklist covering food, equipment, seating, and ambiance at least one week before your BBQ
- Start simple: Begin with foolproof foods like burgers and hot dogs before attempting more complex BBQ recipes
- Prep strategically: Complete 80% of your food preparation before guests arrive to minimize cooking stress
- Create zones: Designate specific areas in your yard for cooking, dining, and socializing
- Consider timing: Schedule your BBQ during late afternoon to early evening hours for optimal comfort and lighting
- Include options: Always provide vegetarian alternatives and be mindful of common food allergies
- Safety first: Keep a fire extinguisher nearby and establish clear boundaries for children around the grill area
“Barbecue may not be the road to world peace, but it’s a start.”
— Anthony Bourdain, renowned chef, author, and travel documentarian
Recommended BBQ Equipment
Before diving into BBQ hosting details, here are four essential products that will help ensure your success as you host a backyard BBQ party.
Weber Original Kettle Premium Charcoal Grill, 22-Inch
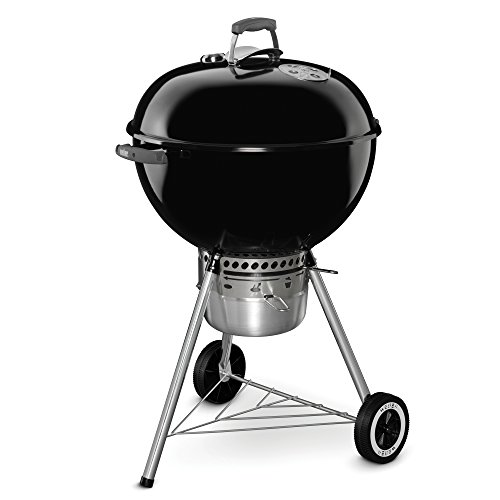
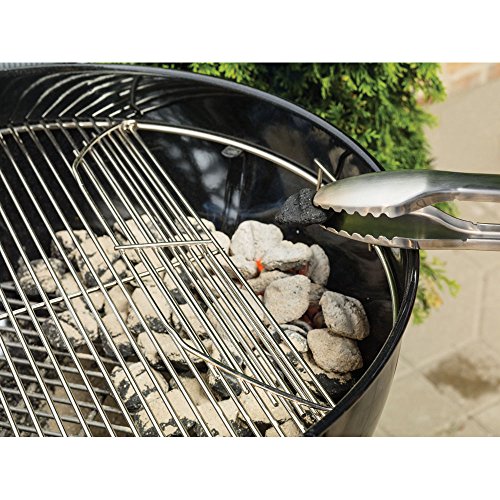

Grill like a pro with the Weber Original Kettle Premium Charcoal Grill, a backyard classic built for flavor and performance. This 22-inch grill holds up to 13 burgers and features Weber's signature porcelain-enameled lid and bowl for optimal heat retention and long-lasting durability. With a one-touch cleaning system and a high-capacity ash catcher, cleanup is a breeze. The built-in lid thermometer, hinged cooking grate for easy charcoal access, and lid hook for mess-free grilling make this the ideal grill for BBQ beginners and seasoned pitmasters alike.
- Heat Retention: Porcelain-enameled lid and bowl trap heat efficiently and resist rust or peeling.
- Easy Cleanup: One-touch cleaning system with ash catcher simplifies post-BBQ maintenance.
- Convenient Design: Hinged grate and lid hook offer easy charcoal access and hands-free lid storage.
- Limited Space: 22-inch surface may be too small for large gatherings.
- No Side Table: Lacks built-in prep or workspace compared to larger grills.
- Charcoal Only: Not ideal for those who prefer gas grilling convenience.
Perfect for beginners with easy temperature control, ample cooking space, and built-in ash catcher. This versatile grill handles everything from burgers to slow-cooked ribs.
ThermoPro TP19 Waterproof Digital Meat Thermometer


Get perfect results every time with the ThermoPro TP19 Waterproof Digital Meat Thermometer, your must-have kitchen and BBQ companion. Designed for precision and ease, this thermometer delivers ultra-fast, accurate readings in just 2-3 seconds with ±0.9°F accuracy. Its ambidextrous auto-rotating display makes it user-friendly for both left and right-handed cooks, while the waterproof design and magnetic back offer unmatched convenience. With motion-sensing technology and a long-lasting battery, it's always ready when you are. Whether you’re grilling, baking, or making candy, this thermometer ensures every dish is cooked to perfection.
- Fast & Accurate: Instant readings in 2-3 seconds with ±0.9°F precision.
- Waterproof & Durable: Easy to clean and built to last with NSF certification.
- User-Friendly Display: Ambidextrous auto-rotating screen ideal for any angle.
- No Bluetooth or App: Lacks smart connectivity features found in some models.
- Hand Wash Only: Not dishwasher safe; must be cleaned manually.
- Small Buttons: May be tricky to operate for users with larger hands.
Eliminate guesswork with this instant-read thermometer that ensures perfectly cooked meats every time. Features backlit display and waterproof design for BBQ in any conditions.
Grillaholics Grill Mat Set of 2
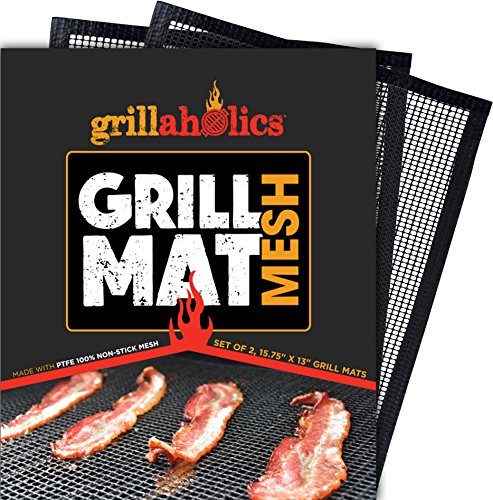


Upgrade your grill game with the Grillaholics BBQ Mesh Grill Mat, the ultimate solution for mess-free, flavor-packed grilling. Designed with precision for pit masters and backyard chefs alike, this set of two mesh mats allows optimal airflow for enhanced smoky flavor while keeping your food from falling through the grates. Made from high-quality PTFE-fiberglass, they’re ultra-durable and reusable up to 1000 times per side. Compatible with any grill and dishwasher safe, these mats make cooking and cleanup a breeze. Backed by the Grillaholics lifetime warranty, you're set for grilling greatness every time.
- Enhanced Flavor: Mesh design allows smoke to circulate for better taste.
- Easy Cleanup: Dishwasher safe and folds for quick grease removal.
- Reusable & Durable: Lasts up to 1000 uses per side—great value.
- Not Ideal for High-Heat Searing: Best for low to medium heat grilling.
- Limited Surface Area: Mesh design not ideal for very small or liquid foods.
- Requires Proper Care: Rough scrubbing may reduce nonstick coating lifespan.
These non-stick mats prevent small foods from falling through grates while allowing grill marks to form. Dishwasher safe and reusable for hassle-free cleanup.
Weber 6630 3-Piece Stainless Steel Grill Tool Set


Elevate your grilling experience with the Weber Precision 3-Piece Grilling Tool Set, crafted for control, comfort, and durability. This essential set includes a precision spatula, hands-free locking tongs, and a full-size silicone basting brush, everything you need for a successful barbecue. The 3-sided beveled spatula ensures effortless flipping from any angle, while the soft-touch handles provide a secure grip even in the heat of the moment. With stainless steel construction and dishwasher-safe design, this set is as tough as it is convenient. Whether you're a seasoned grill master or just getting started, Weber's trusted quality has your back.
- Precision Design: 3-sided beveled spatula and locking tongs offer top-notch control.
- Comfort Grip: Soft-touch, non-slip handles enhance comfort and handling.
- Easy Maintenance: Dishwasher safe for quick and simple cleanup.
- Brush Bristles: Silicone basting brush may not hold thinner sauces as well.
- Tool Size: Full-size tools may be bulky for smaller grills or tight storage.
- Weight: Slightly heavier build may not suit those preferring lightweight tools.
Essential high-quality utensils (spatula, tongs, fork) with comfortable grips and convenient hanging hooks for organized grilling.
Choosing Your Equipment
My journey into BBQ mastery began with an overwhelming walk through a home improvement store’s grilling section. Surrounded by everything from simple charcoal kettles to stainless steel gas behemoths with more BTUs than I knew what to do with, I froze. Should I embrace the tradition of charcoal or opt for the convenience of gas? What size would accommodate my typical guest list? Was a smoker box necessary, or just another gadget destined for the garage shelf?
If you’re planning to host a backyard BBQ party, choosing the right equipment is your first big step. The grill you select can make or break your experience, not just in terms of food, but also how much stress (or ease) you feel during the event. It’s not about having the fanciest setup, but the one that fits your needs, space, and style of cooking.
Gas vs. Charcoal: The Great Debate
For beginners, this choice often presents the first roadblock. Here’s what I’ve learned:
Gas grills offer convenience and temperature control. With the turn of a knob, you’re cooking in minutes—perfect for weeknight grilling or impromptu gatherings. Clean-up is minimal, and you’ll never run out of fuel mid-cookout (assuming you check your propane tank beforehand, which I learned the hard way during a dinner party).
Charcoal grills deliver that quintessential smoky flavor that many BBQ purists consider essential. They’re typically less expensive upfront but require more time to heat up (about 20-30 minutes) and involve dealing with ash cleanup. The learning curve for temperature management is steeper, but many enthusiasts find the process more rewarding.
If you’re planning to host a backyard BBQ party, your choice of grill will set the tone for the event. My advice: If you’re just starting out and want to focus on enjoying the experience rather than mastering fire management, a gas grill might be your best bet. I began with a modest three-burner gas grill that served me well for years before adding a charcoal kettle to my arsenal when I felt ready to expand my skills.
Essential Accessories
Beyond the grill itself, a few key tools can dramatically improve your BBQ experience—especially when you’re preparing to host a backyard BBQ party:
- Long-handled tools: A quality spatula, tongs, and fork will keep your hands safely away from the heat.
- Meat thermometer: This was a game-changer for me. No more cutting into meat to check doneness (and releasing all those precious juices in the process).
- Grill brush: Regular cleaning extends your grill’s life and prevents yesterday’s salmon from flavoring today’s burgers.
- Chimney starter: If you choose charcoal, this inexpensive device eliminates the need for lighter fluid, resulting in better-tasting food.
- Heat-resistant gloves: My addition after a minor burn incident taught me that oven mitts aren’t always up to the task of outdoor grilling.
Remember, you don’t need a high-end toolkit to get started. Just a few thoughtfully chosen accessories can make it easier and safer to host a backyard BBQ party your guests will rave about.
Planning Your Menu
The heart of any successful BBQ is, of course, the food. As a novice host, I made the classic mistake of attempting too much, too soon—trying to impress with complicated recipes instead of mastering the fundamentals first.
If you’re getting ready to host a backyard BBQ party, the best approach is to keep your menu simple and crowd-friendly, especially in the beginning.
Begin With the Basics
For your first few gatherings, stick to crowd-pleasers that are forgiving on the grill:
- Burgers: Start with 80/20 ground beef (the fat content keeps them juicy), and make patties slightly larger than your buns as they’ll shrink during cooking. A simple dimple pressed into the center helps them cook evenly without puffing up.
- Hot dogs and sausages: These pre-cooked options just need heating and some appealing grill marks, making them nearly foolproof.
- Chicken breasts: Pound them to even thickness, marinate for moisture and flavor, and they’ll cook more consistently.
- Corn on the cob: Grill in husks for a steamed effect or directly on grates for charred kernels—either way, they’re simple and delicious.
As your confidence grows, you can expand your menu with ribs, kebabs, grilled veggies, or even desserts. But when you’re aiming to host a backyard BBQ party that’s smooth and enjoyable, starting with the basics ensures less stress and more time mingling with guests.
Don’t Forget the Sides
A common oversight is focusing so intently on the grilled items that sides become an afterthought. Yet these dishes often become the unsung heroes of the spread, providing balance to the meal and options for various dietary preferences.
Consider preparing make-ahead sides that taste great at room temperature:
- Pasta or potato salad (prepared the night before and allowed to meld flavors)
- Cole slaw with a vinegar-based dressing (more food-safe for outdoor serving than mayonnaise-based)
- Grilled vegetable platters that can be served at any temperature
- Fresh fruit salad for a refreshing counterpoint to rich grilled foods
My time-saving strategy: prepare at least 80% of side dishes the day before. This allows you to focus on grilling and hosting when guests arrive rather than being trapped in the kitchen.
Vegetarian and Dietary Considerations
One of my early hosting oversights was not providing substantial options for non-meat eaters. Now I always include:
- Portobello mushroom caps (marinated and grilled like burgers)
- Vegetable skewers with firm tofu chunks
- Corn and black bean salad that serves as both side and vegetarian main
- Plant-based burger alternatives for those who enjoy the BBQ experience without meat
When inviting guests, I’ve learned to proactively ask about dietary restrictions. Having a few allergen-free options shows thoughtfulness and ensures everyone enjoys the meal without feeling singled out.
Preparation Timeline
The secret to a relaxed BBQ isn’t just what you prepare, but when you prepare it. Here’s the timeline I’ve refined over years of hosting:
One Week Before
- Finalize your guest list and send invitations
- Plan your menu and create a shopping list
- Inventory your equipment and supplies, noting any needed purchases
- Check weather forecasts and prepare a backup plan for inclement weather
Two Days Before
- Clean and prep your outdoor space
- Shop for non-perishable items and drinks
- Begin marinating meats that benefit from longer flavor development (like brisket)
- Prepare and refrigerate make-ahead sides like pasta salads or slaws
The Day Before
- Shop for fresh ingredients
- Clean and prep your grill
- Prepare as many side dishes as possible
- Set up serving tables, seating areas, and shade structures
- Chill beverages in coolers or refrigerator
- Prepare seasoning blends, sauces, and condiments
The Morning Of
- Set up your outdoor space with tables, chairs, and decorations
- Arrange serving stations and utensil holders
- Prepare any remaining side dishes
- Form burger patties and prep foods for the grill
- Set out non-perishable items like chips and dips
One Hour Before
- Light the grill to reach proper temperature
- Set out ice-filled coolers for drinks
- Arrange condiments and toppings bars
- Position trash and recycling receptacles strategically
This staggered approach prevents the last-minute scramble that characterized my early hosting attempts and allows you to greet guests looking composed rather than frazzled.
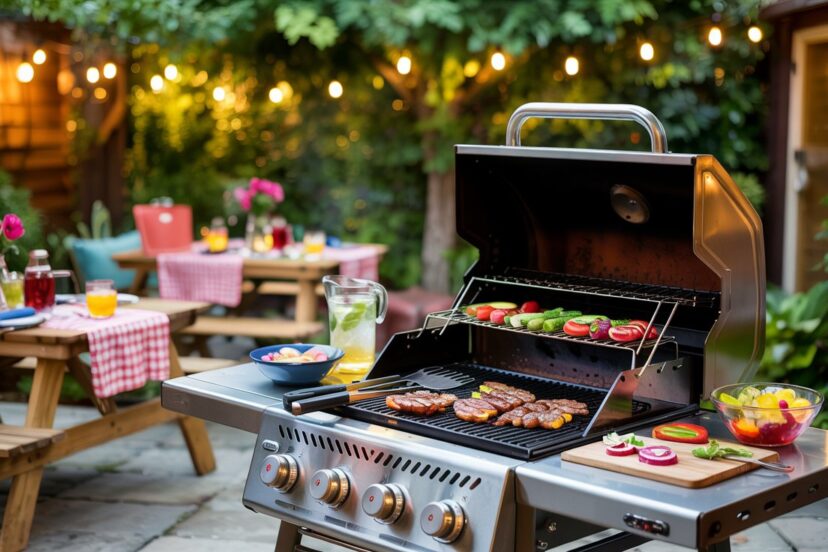
Creating the Perfect Atmosphere
A memorable BBQ transcends the food to create an experience. The atmosphere you cultivate can transform a simple meal into an occasion guests talk about long afterward.
Setting the Scene
Your backyard doesn’t need to rival a design magazine spread, but a few thoughtful touches make a difference:
- Seating arrangements: Create conversation clusters with chairs and small tables rather than a single large table that can limit interaction
- Shade options: Umbrellas, canopies, or natural tree coverage ensure comfort on sunny days
- Lighting: String lights, solar pathway markers, or lanterns extend the gathering past sunset while creating ambiance
- Music: A weather-resistant bluetooth speaker playing a prepared playlist sets the mood without requiring your attention during the event
I learned the importance of lighting the hard way when an evening BBQ left guests fumbling in near-darkness as they tried to add condiments to their burgers. Now I ensure pathways are lit, eating areas have sufficient illumination, and ambient lighting creates atmosphere without blinding anyone.
Activity Options
While conversation often flows naturally around food and drinks, having a few activity options can help break the ice among guests who may not know each other well:
- Lawn games like cornhole, horseshoes, or bocce
- A designated kids’ area with bubbles, chalk, or water toys
- A simple photo area with props related to your BBQ theme
- Background music that encourages spontaneous dancing as the evening progresses
My personal touch is keeping a polaroid-style camera on hand to capture candid moments, creating physical mementos guests can take home.
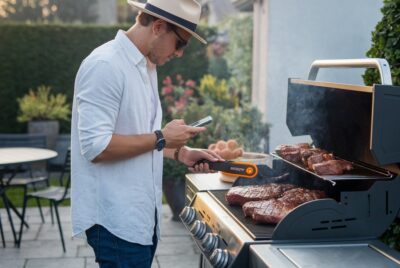
The Art of Grilling
After all the planning and preparation, the moment of truth arrives: the actual grilling. This is where many novice hosts feel their confidence waver, but a few foundational principles will guide you to success.
Temperature Management
Perhaps the most crucial skill in grilling is understanding and controlling heat. Rather than cooking everything over raging flames, create temperature zones on your grill:
- High heat zone: For searing and creating those coveted grill marks (about 450-550°F)
- Medium heat zone: For cooking most items through without burning (about 350-450°F)
- Low heat/indirect zone: For slower cooking of larger cuts or for holding finished items (about 250-350°F)
On a gas grill, this is as simple as adjusting the burners to different levels. On charcoal, bank more coals to one side to create a hot zone, with fewer or none for your cool zone.
My early mistake was treating the entire grill surface as one temperature, leading to burgers that were charred outside but raw inside. Learning to move items between zones revolutionized my results.
Timing Is Everything
Coordinating cooking times to ensure everything reaches the table at optimal doneness requires planning:
- Start with items requiring longest cooking times (like bone-in chicken)
- Add medium-duration items (burgers, vegetable skewers) when long-cooking items are halfway done
- Quick-cooking items (hot dogs, thin steaks) go on last
- Use the indirect heat zone to keep finished foods warm without overcooking
A grill timer or smartphone reminders help track multiple items simultaneously. I keep a small notepad near the grill to jot down when each item started cooking, a habit formed after serving some questionably rare chicken at an early gathering.
The Guest Experience
As the designated grill master, it’s easy to become isolated from your own party. To balance cooking responsibilities with hosting:
- Position the grill where you can still interact with guests
- Designate a co-host to manage non-cooking aspects while you’re at the grill
- Consider a “cook ahead, serve later” approach for some items
- Invite interested guests to participate in simple grilling tasks
Some of my favorite hosting moments have come from teaching curious friends how to test burger doneness or properly flip chicken without tearing the skin, turning the cooking process into a social activity rather than a solo performance.
Drinks and Refreshments
A well-planned beverage station is as important as the food offerings at your BBQ. Keeping guests hydrated, especially during warmer months, enhances everyone’s experience.
Setting Up a Self-Serve Station
Create a dedicated drink area away from the grill zone to prevent congestion:
- Large dispensers of ice water infused with fruits or herbs
- A cooler or tub filled with ice for canned and bottled beverages
- Clear signage for alcoholic versus non-alcoholic options
- Unbreakable glassware appropriate for outdoor use
For large gatherings, I use colored cups or drink markers to help guests keep track of their beverages, reducing waste and confusion.
Beverage Selection
Offer variety without overwhelming yourself with options:
- Non-alcoholic: Water, lemonade, iced tea, and soda cover most preferences
- Beer: A light option and a fuller-flavored choice satisfy different palates
- Wine: A crisp white and a versatile red work for most outdoor meals
- Batch cocktail: A single pre-mixed option like sangria or spiked lemonade simplifies serving
My signature move is a large dispenser of “BBQ water”—ice water infused with cucumber, lime, and mint—that provides refreshing hydration beyond plain water but without added sugar or alcohol.
Safety Considerations
The combination of fire, food, and festivity requires attention to safety details that might not be concerns for indoor gatherings.
Food Safety
Outdoor dining presents specific challenges:
- Keep cold foods below 40°F using ice baths beneath serving dishes
- Don’t leave perishable foods unrefrigerated for more than two hours (one hour if temperature exceeds 90°F)
- Use separate plates and utensils for raw and cooked meats
- Have multiple clean utensils available for serving different dishes
I keep a digital thermometer not just for checking meat doneness but also for monitoring the temperature of refrigerated dishes sitting out during service.
Grill Safety
Prevent accidents with proper precautions:
- Position your grill on level ground away from structures, overhanging branches, and high-traffic areas
- Keep a fire extinguisher within reach (and know how to use it)
- Never leave a lit grill unattended
- Create a visible “kid-free zone” around the cooking area
- Allow the grill to cool completely before covering or storing
After a close call when a guest’s flowing sleeve nearly caught fire, I now make a point of briefly mentioning grill safety when showing newcomers around my yard.
Weather Contingencies
Even the most meticulously planned outdoor event remains at the mercy of weather:
- Have a covered area or indoor backup plan
- Secure lightweight items that could blow away in sudden winds
- Keep electronic equipment protected from unexpected rain
- Provide sunscreen and bug repellent for guests’ comfort
An easily deployable pop-up canopy has saved more than one of my gatherings from weather disruption and is worth the investment for regular outdoor entertainers.
Post-BBQ Cleanup
After the last guest departs, efficient cleanup prevents next-day regrets and protects your equipment investment.
Immediate Tasks
Some cleanup steps shouldn’t wait:
- Properly extinguish and cool down your grill
- Refrigerate or freeze leftovers within two hours of serving
- Collect trash and recycling before going to bed
- Bring in items that shouldn’t be left exposed to overnight elements
I keep large, labeled food storage containers ready before the event starts, allowing quick organization of leftovers without hunting for matching lids while exhausted.
Next-Day Maintenance
Once rested, complete these tasks:
- Clean your grill according to manufacturer’s instructions
- Wash and store serving platters and utensils
- Take inventory of supplies for future gatherings
- Note what worked well and what you’d change next time
My post-event ritual includes maintaining a hosting journal where I record menu hits and misses, quantities that proved appropriate, and ideas for future improvements while the experience is fresh in my mind.
Conclusion
Hosting a backyard BBQ as a beginner doesn’t require culinary expertise or an elaborate outdoor kitchen, just thoughtful preparation, realistic expectations, and the willingness to learn from each experience. What began as an intimidating challenge for me has evolved into one of my greatest joys: creating a space where friends and family connect over flame-kissed food and flowing conversation.
Remember that the most memorable gatherings often include minor imperfections that become favorite stories later. The slightly overcooked burgers or the sudden rain shower that moved everyone under the garage overhang aren’t failures—they’re the unique moments that distinguish your event from a standard restaurant meal.
Start simple, expand your skills gradually, and focus on creating an atmosphere of relaxed hospitality. Before long, you’ll find yourself confidently fielding requests for your “secret” burger seasoning and planning themed BBQs that showcase your growing expertise.
Most importantly, don’t get so caught up in hosting perfection that you forget to enjoy your own party. The ultimate measure of BBQ success isn’t flawless execution but the laughter, conversations, and connections that happen around the grill. Your journey from anxious beginner to confident host begins with lighting that first fire and extends through countless gatherings to come.
“Food brings people together on many different levels. It’s nourishment of the soul and body; it’s truly love.”
– Giada De Laurentiis, chef and television personality
Frequently Asked Questions
Q: How much food should I prepare per person for a backyard BBQ?
A: Plan for approximately 1/3 to 1/2 pound of meat per adult (pre-cooked weight), 2-3 side dish options with about 4-6 ounces per person per side, and about 1.5-2 beverages per person per hour. It’s better to have some leftovers than to run short on food.
Q: What’s the ideal time of day to host a backyard BBQ?
A: Late afternoon to early evening (around 4-5 PM) works well for most BBQs. This timing allows for comfortable temperatures, good lighting for cooking, and a natural progression into evening relaxation. For summer gatherings, slightly later starts avoid the most intense heat of the day.
Q: How can I keep bugs away from my BBQ without using chemicals near food?
A: Use natural deterrents like citronella candles positioned around the perimeter of your gathering space. Fans directed over food serving areas discourage flying insects. Cover dishes with mesh food tents when not being served, and consider planting bug-repellent herbs like lavender, rosemary, or mint around your patio area.
Q: What’s the best way to handle rain on the day of my planned BBQ?
A: Have a backup plan ready, either a covered patio area, garage with good ventilation, or rescheduling option. If proceeding with a slightly rainy day BBQ, set up pop-up canopies for the cooking and serving areas, move the grill to a covered but well-ventilated space, and adjust your menu to reduce grill time if necessary.
Q: How do I clean my grill properly after the BBQ?
A: While the grill is still warm (not hot), use a wire brush to remove food particles from the grates. Once completely cool, remove and clean the grates thoroughly with hot soapy water, empty the ash catcher if using charcoal, and wipe down exterior surfaces. For deep cleaning, follow your specific grill manufacturer’s instructions, as gas and charcoal grills have different maintenance needs.